Here is the set-up we have had while we were waiting for a sale on TV hangers.
The TV is sitting on top of Timmy's antique watchmakers bench.
The cable/DVR box sits beside it on a smaller stand.
My goal was to get rid of the small stand by hanging the TV on the wall and putting the cable box on top of the watchmakers bench.

We never saw the price of the TV hangers come down, so I started thinking of other alternatives.
A few weeks ago I came up with a great idea and I asked Tim to make a small stand for the TV.
I wanted a something that would fit on top of the watchmakers bench and hold the TV up about 6 inches. The cable box would slide under the small stand and everything would be housed together on the watchmakers bench.
The more I thought about a TV stand, the more excited I got about it. This would solve all of my TV/cable box problems and wouldn't cost very much at all.
Then I got my new pink girl tools for my birthday, and I wondered if I could make the TV stand by myself.
I decided to try.
One afternoon, while Timmy was still at work I ventured down to his mancave to see if I could find some scrap wood and a saw.
I found a long board that looked like it would work, and I also found a small saw. I took everything out to my screened porch.
I measured across the top of the watchmakers bench (40 inches) and I made my marks on the board where I should saw.

I have never used a saw in my entire life. How hard could it be?
It wasn't really hard, but it made my arm and hand tired after sawing only a few inches. I took a lot of breaks, but I eventually got through it a few inches at a time.
WOW! I actually sawed a board!!!

After my 40 inch top board was cut, I measured two 6-inch pieces to use for the "legs" of the TV stand.
Again, it took a while, but I eventually got all of my pieces cut.
Tim came home from work just after I finished sawing. At this point I wouldn't let him help me AT ALL, but he did offer some advice on how to use the saw. He was pretty impressed that I had taken on this project by myself and he agreed to let me finish it by myself.
Next, I sanded all sides of my cut boards with Tim's palm sander. I have used this sander before on other projects, so this part was easy for me.

After everything was sanded nice and smooth, I nailed it all together.
At this point, Tim suggested I add a long piece across the back of the stand so it would be more stable. I cut another piece, sanded it and nailed it in place.
When it was finished, my TV stand looked like this:

I went downstairs again and hunted for some wood stain. I found 2 cans, and both were a different shade of mahogany.
I always thought mahogany had reddish tones? Maybe not, because the stain I chose came out a rich dark brown...........just the color I wanted to match the watchmakers bench.
I have never used stain before. It seemed to go OK.
I rubbed it on in the direction of the wood grain using a rag. I made sure to wipe off all the drips and puddles

After 2 coats of stain:
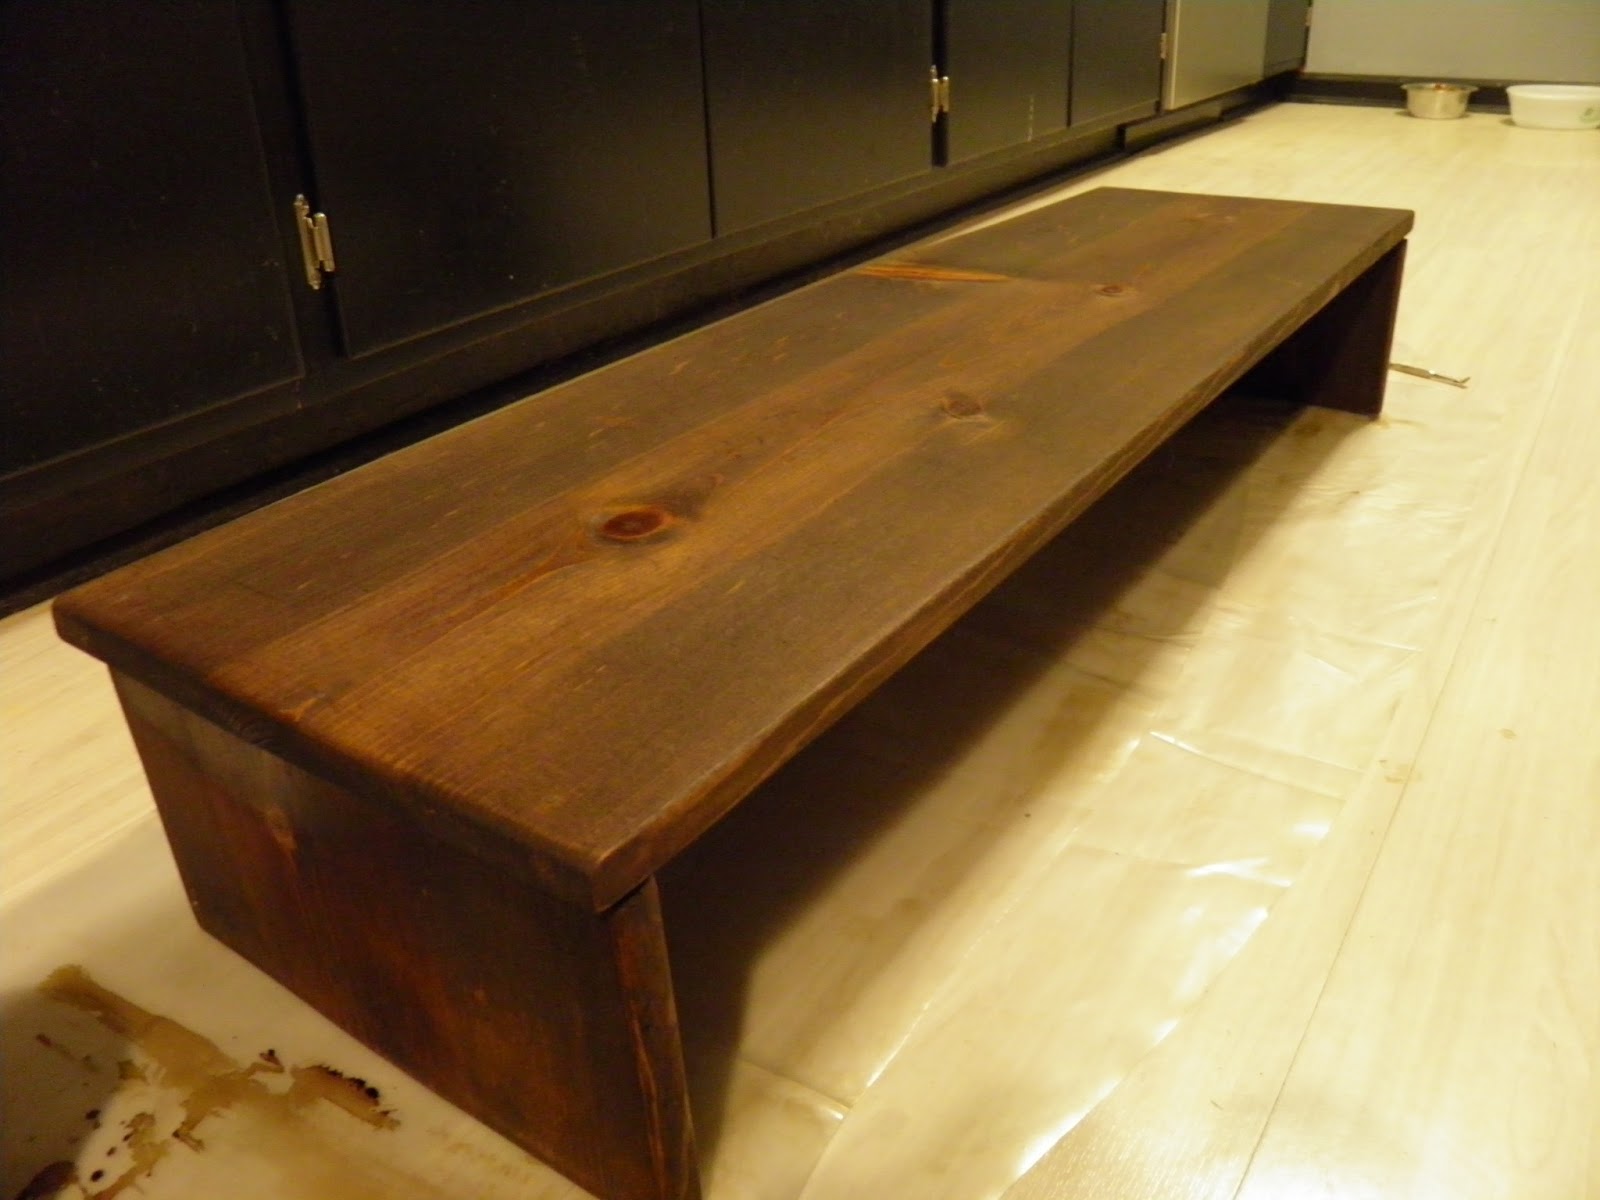
I let it dry overnight.
When we woke up the next morning and Tim saw my finished TV stand, he said he was very proud of me.
I was pretty proud of myself too! My first wood project EVER, and it turned out just the way I had hoped it would.
We put it in place on top of the watchmakers bench, and we love it!!!!


Now what can I make?? I can't wait to make something else now!!
You're my hero! It looks awesome!!
ReplyDeleteThanks Jess! You are too kind!
DeleteBest shelf I've ever seen.Proud of you Girl.
ReplyDeleteProud of you Girl. It's perfect.
ReplyDeleteThank you Sweetheart!!
Delete